|
|

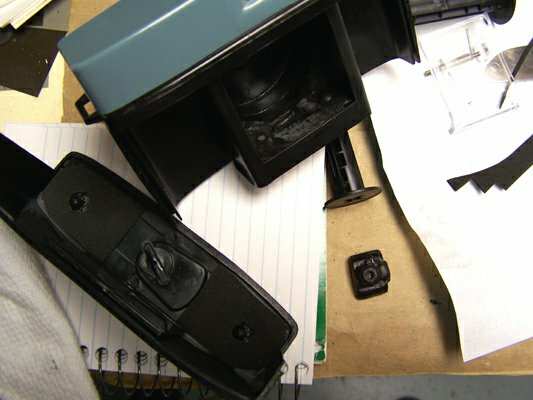
this is the 9 USD Diana clone i found online. it was immediately obvious that it needed
the attention of someone who could take the time and had the materials / tools to attempt
a decent job - this belief was confirmed by the fact that only one other person expressed
even a feeble interest in owning this train-wreck
Shakey's indeed !
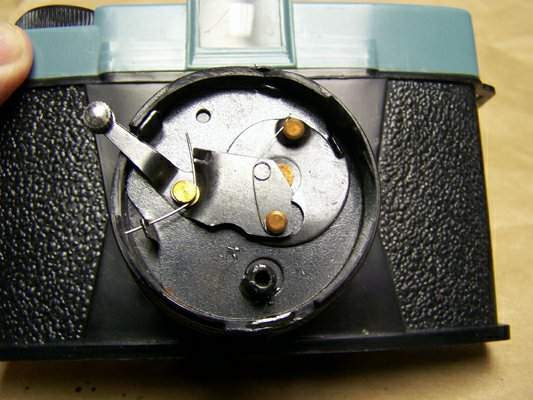
this was also a perfect opportunity to inspect the shutter assembly - Diana cameras are notorious for their fused plastic cases. this is one reason so many people modify a Holga, but almost never a Diana. plus Holgas are crap, and cheap crap at that
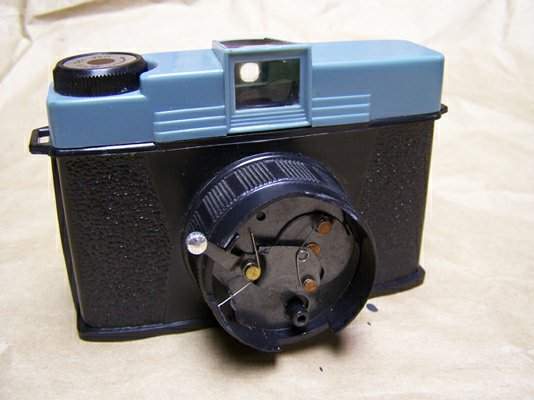
upon its arrival i was relieved to find that the camera's condition was the same as indicated by the auction photo. the only surprise was that the bottom locking plate was missing. the auction photo indicated that one spool tab was missing. a new replacement tab would be trivial to fabricate. my main concern was duplicating the locking plate on the bottom of the camera ; would the tolerances be difficult to duplicate ?
the lens barrel had been cleanly broken off but amateurish repair attempts left a variety
of residue on the surfaces that i'd be adhering together. removing this residue turned out to
be easier than i'd feared as the adhesives weren't suitable in the first place. SWISH !
at this point i began to examine the aperture selector arm and discovered the worst of it : the post holding the selector arm in place is in the bottom of the lens (actually the post comes trough the shutter assembly plate, and is part of the camera body) while the dimples (which securely position the arm in place) are on the opposite side of the selector arm : the top. sufficient pressure would be impossible to assure before the lens was reassembled, which is too late given the adhesives called for by the materials used in making the camera
because of the uncertainty surrounding the pressure that would be applied to the
selector arm i considered cutting threads inside the post and using a fiber washer for
tension. the more i thought about this the less i liked it as an option since the dimple,
unless removed, might interfere and the possibility of the screw backing out over time
and losing all tension would be impossible to correct once the lens was closed
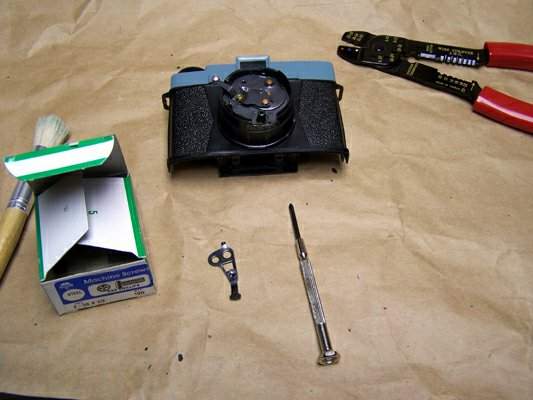
finding the correct diameter screw to hold the selector arm in place was easy - a snip later and the screw was also the proper length. after cleaning out the hollow post i was ready to mix up some rapid-set industrial epoxy
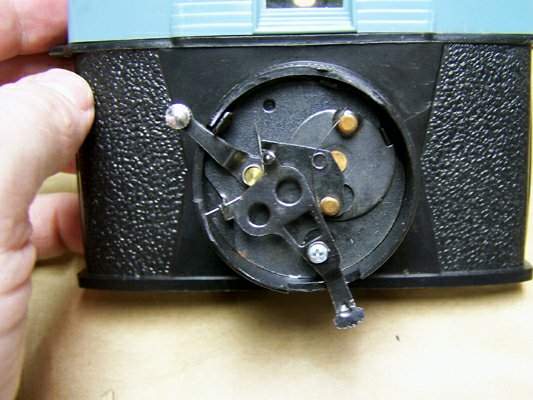
after forcing some epoxy into the hollow post i just needed to test fit the screw, remove the screw, clean-up any squeeze-out, and again re-insert the screw with the selector arm in place. sitting around waiting for epoxy to dry is my version of Dante's Inferno : pure Hell ... i couldn't wait to get to something else, but the possibility that the arm might become stuck in a given position necessitated my moving it until curing was 'to the touch' stage. after that the chances of something going wrong were acceptably small

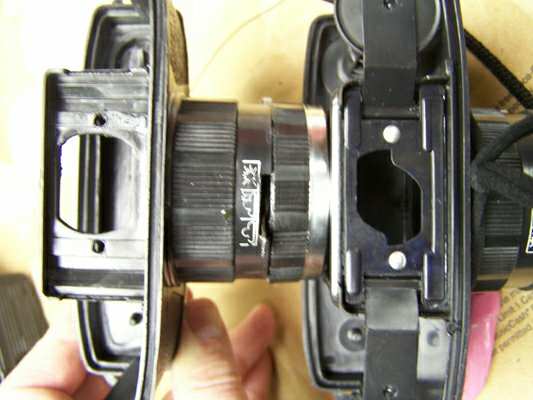
can you tell which is the original film spool tab ? the one on the right is made of an
unsuitable epoxy (excessive sanding was needed as well, as it was the first made), the one
on the left was more resilient and better suited to the job
[ ed : at the time he didn't know, but this was a fool's errand ]
next up was the bottom plate. my innate belief that the frame to which it would be riveted
was sound proved false ... let's watch
after comparing it with my Diana (or is that one of my Diana clones ?) i made careful
measurements, knowing in my heart that it wouldn't work out perfectly. after cutting a test
piece from a sheet of clear acetate (just to confirm measurements, etc) it was obvious the spool
holders were going to work perfectly.
[ ed : when things go this well early on it's a sure sign of impending disaster ]

after setting the plate and spool tabs in position and riveting the plate to the frame,
it was obvious that the plate had seriously deformed. prying off the plate (i'd enlarged
the rivet holes to limit the potential damage from mechanical expansion - a snug fit would
be fine, as opposed to possibly damaging the frame) made it obvious : i'd not inspected the
frame carefully enough. the frame was already seriously cracked from the earlier removal
of the original locking plate by a previous owner (a clumsy attempt to acquire spare parts
would be my guess) but the cracks were hidden by the blackness of the recesses of this
clone's dark little heart
so close, and yet so far - time for a brisk walk around the block
next i removed the plate and set aside the spool holders (getting all this to align inside a
tiny closed box would be too much to attempt) and pulled out my modeling epoxy, filling-in
the bottom of the housing, as well as around the inside of the base of the framework (somewhat
visible in a subsequent photo)
after letting it sit in the freezer for several minutes (to temporarily stiffen the epoxy)
i cut out the opening of the locking mechanism - the residue became a charming (groan !)
Holga ... see next shot. anyway, the plate required several more adjustments to ensure good
alignment with the back as well as clearance for the locking mechanism itself
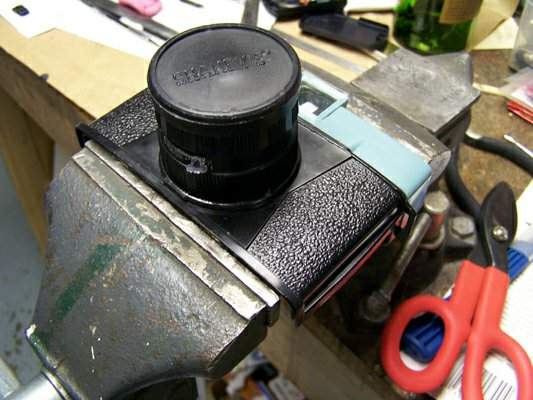
the camera was put into the clamp to exert a small, consistent force against any shifting on the part of the plate - it worked well, and when the back is in place (see last step) the latch locks the back in place perfectly and holds it more securely than i might have hoped
nearly done, i ran a roll of film through the camera to see how bad the light leaks would
be - the back never fit properly, so i later clamped it and stuck it into my hot box
overnight, at about 135 degrees. the back fits better now, but i'll repeat that step in a
few days to see if i can further improve the situation
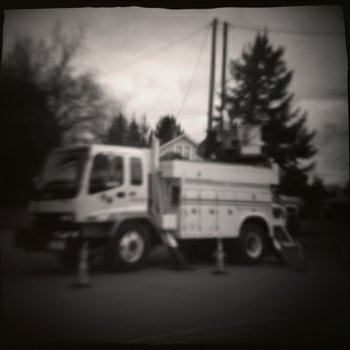
this first image was shot at about 40 MPH from the drivers-side window as i passed a utility crew hard(ly) at work
here you can see the Holga charm (my modified Holga was lying on the bench nearby, and being
all black the epoxy inspired me)
also visible are the new dimples (cast using the above mould, from back when i expected to make, and use, new spool tabs) which were placed onto the bottom of the camera back, and some foamy (applied with 'power poxy' spray) which now provides additional stability and suitable film tension - i hope !
this is about all i plan to do with this Diana clone : my original goals were to
get a peek inside a camera which cannot be opened without damage, and to return this
collection of damaged bits into service as a working Diana (clone) camera which someone
would treasure.
not bad for a few bucks, as long as the limitations of the original camera design are
taken into account (namely no limited focus ring, as in the original Diana, and no Bulb setting)
UPDATE : after putting a second roll through the camera i've come to the conclusion that what i initially believed to be light leaks were, in fact, caused by removing loose film in daylight. the second roll indicates that the camera functions extremely well, but the film advance could be improved by tweaking the tension a bit more